Arduino IDE의 메뉴에서 파일 > 예제를 선택하여 스크롤해보면 보이는 Arduino UNO R4 WiFi의 예제중에 LED_Matrix 항목에 있는 예제를 하나씩 테스트해봤습니다.
8가지 예제 코드 중.. DisplaySingleFrame과 TextWithArduinoGraphics가 쓸만해보입니다.
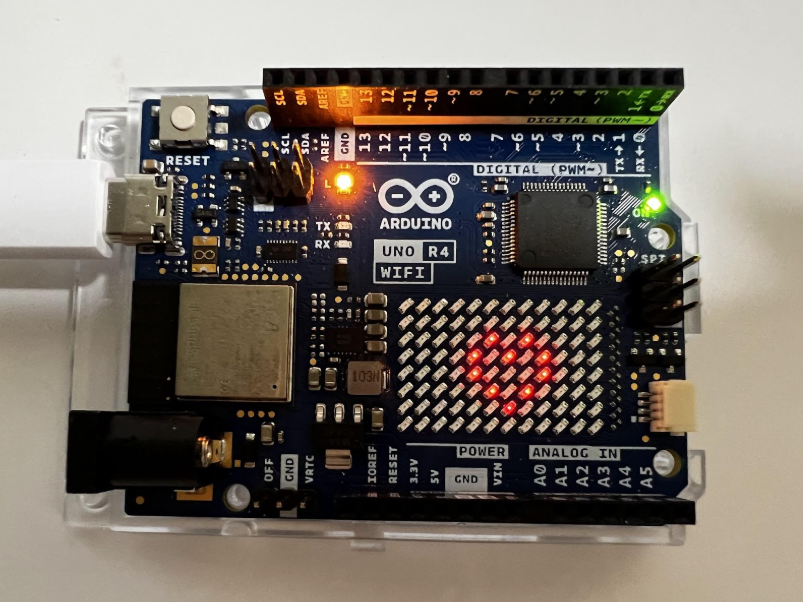
DisplaySingleFrame 실행하면 간단한 그림(아이콘)을 번갈아가며 보여줍니다.
코드를 보면 미리 그림을 정의해놓았다는 것을 알 수 있습니다.
/* Single Frame Displays single frames using matrix.loadFrame See the full documentation here: https://docs.arduino.cc/tutorials/uno-r4-wifi/led-matrix */ #include "Arduino_LED_Matrix.h" // Include the LED_Matrix library #include "frames.h" // Include a header file containing some custom icons ArduinoLEDMatrix matrix; // Create an instance of the ArduinoLEDMatrix class voidsetup() { Serial.begin(115200); // Initialize serial communication at a baud rate of 115200 matrix.begin(); // Initialize the LED matrix } voidloop() { // Load and display the "chip" frame on the LED matrix matrix.loadFrame(chip); delay(500); // Pause for 500 milliseconds (half a second) // Load and display the "danger" frame on the LED matrix matrix.loadFrame(danger); delay(500); // Load and display the "happy" frame on the LED matrix matrix.loadFrame(happy); delay(500); // Load and display the "big heart" frame provided by the library matrix.loadFrame(LEDMATRIX_HEART_BIG); delay(500); // Turn off the display matrix.clear(); delay(1000); // Print the current value of millis() to the serial monitor Serial.println(millis()); }
테스트 해보기 전에 메뉴에서 툴 > 라이브러리 관리를 선택 후, ArduinoGraphics를 검색하여 설치해야 합니다.
코드를 보면 문자열만 제공하면 스크롤하는게 간단하게 구현됩니다.
// TextAnimation works only when ArduinoGraphics is installed and used. // ArduinoGraphics is an external library and needs to be installed using // Library Manager. // To use ArduinoGraphics APIs, please include BEFORE Arduino_LED_Matrix #include "ArduinoGraphics.h" #include "Arduino_LED_Matrix.h" ArduinoLEDMatrix matrix; voidsetup() { matrix.begin(); matrix.beginDraw(); matrix.stroke(0xFFFFFFFF); matrix.textScrollSpeed(100); constchar text[] = " UNO r4 "; matrix.textFont(Font_4x6); matrix.beginText(0, 1, 0xFFFFFF); matrix.println(text); matrix.endText(SCROLL_LEFT); matrix.endDraw(); } voidloop() { // Make it scroll! matrix.beginDraw(); matrix.stroke(0xFFFFFFFF); matrix.textScrollSpeed(50); // add the text constchar text[] = " Scrolling text! "; matrix.textFont(Font_5x7); matrix.beginText(0, 1, 0xFFFFFF); matrix.println(text); matrix.endText(SCROLL_LEFT); matrix.endDraw(); }
Subscribe to 멈춤보단 천천히라도
Don’t miss out on the latest issues. Sign up now to get access to the library of members-only issues.